Settings
In the Settings page, you can manage material presets, configure your gamepad for manual jogging, and set up your Z-probe parameters.
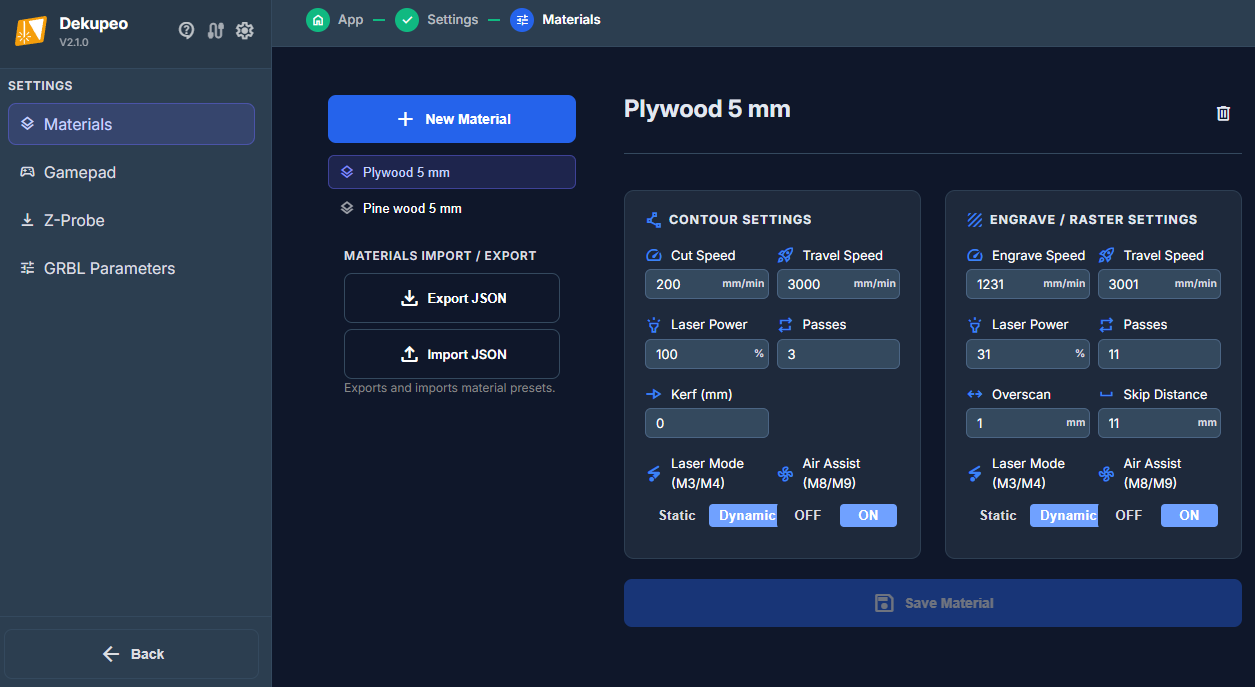
Material Presets
Presets allow you to save verified speed and power settings for different materials (e.g., "Plywood 3mm", "Acrylic 5mm").
- Contour Settings – Define the speed, power, and number of passes required to cut through the material. You can also specify the default Kerf Compensation.
- Engrave / Raster Settings – Define default parameters for vector and raster engraving.
- Import / Export – You can export all your material presets to a JSON file for backup or to share them with other users.
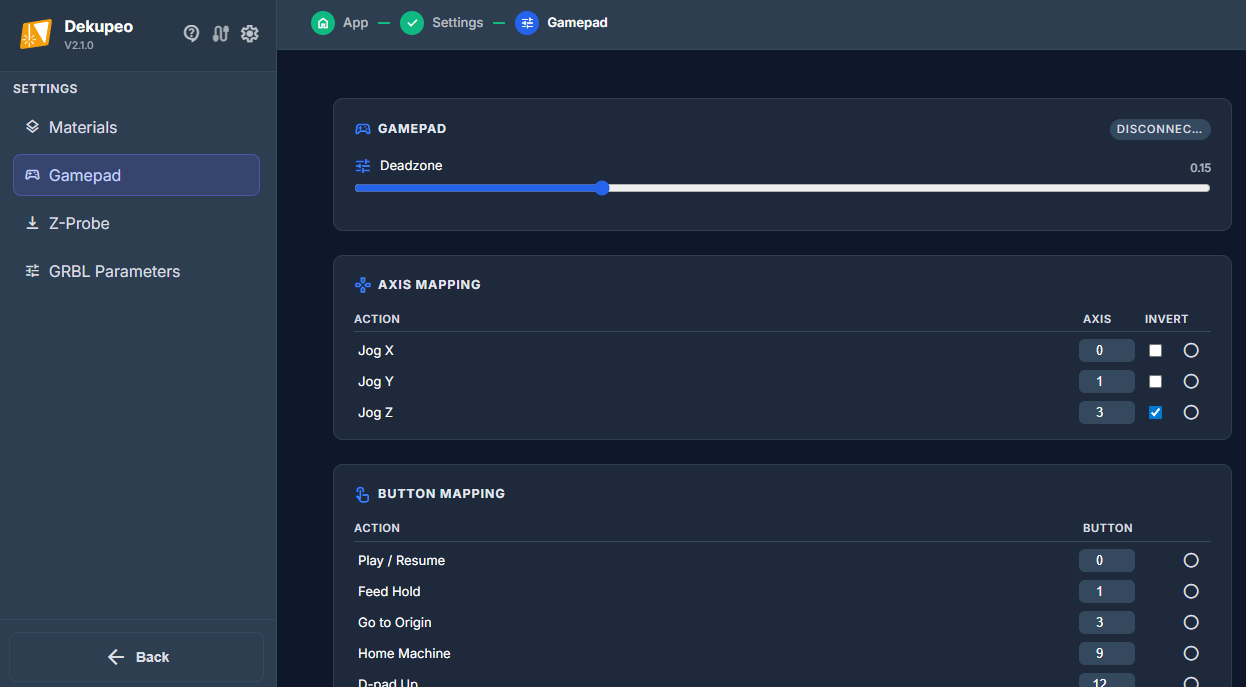
Gamepad Settings
If you have a compatible USB or Bluetooth gamepad, you can use it to control the laser head manually. This is often more convenient than clicking buttons in the UI.
- Axis Mapping – Assign your gamepad's sticks to control X, Y, and Z movements. You can also invert the directions if needed.
- Button Mapping – Map physical buttons to actions like Play, Pause, Go to Origin, and Home Machine.
- Deadzone – Adjust the stick sensitivity to prevent mechanical "drift" when the stick is at rest.
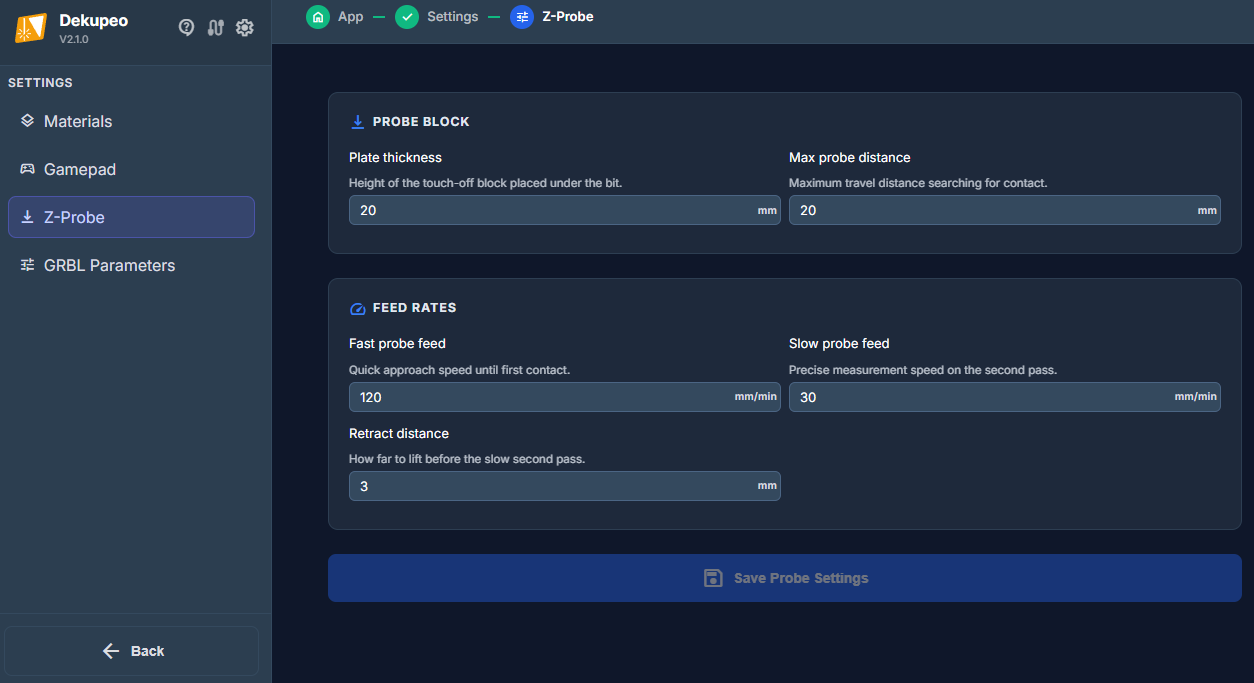
Z-Probe Settings
Configure how the software interacts with your touch plate or Z-probe sensor:
- Probe Block Thickness – Enter the exact thickness of your physical probe block in millimeters.
- Feed Rates – Set the speed at which the laser head descends during probing and the speed for the slower "second touch" for higher precision.
- Search Distance – The maximum distance the laser will travel while searching for the probe block before giving up.
Camera Calibration
Camera Calibration improves real-world size accuracy when you use Shape Autodetection from photos. The calibration process measures your camera lens distortion and stores correction data for future detections.
- Create or select a camera profile – Use separate profiles if you work with multiple webcams or phone cameras.
- Generate calibration overlay – Display or print the ChArUco marker overlay used for calibration.
- Take multiple photos – Capture the marker board from different angles and distances for better calibration quality.
- Apply calibration – Save the computed camera matrix and distortion coefficients to the selected profile.
- Use in Shape Autodetection – During Shape Autodetection, select the calibrated camera profile to undistort photos before contour extraction.
Tips for best results: keep the marker board sharp and well lit, avoid motion blur, and include the full board area in most photos.